How to make your YouTube videos more appealing

With over 400 hours of video content being uploaded every minute YouTube is one of the most important video platforms on the internet.
The stats are more than enough to demonstrate the fact that YouTube is one of the biggest, and the most important video platforms out there on the internet. With over 400 hours of video content being uploaded every minute and over one billion hours of videos being watched every day, YouTube has undoubtedly become the king of all online video platforms.
The good news is most of that content is poorly optimised and will almost never gain traction. As such, to stand out from the crowd, you need to make videos that are entertaining, clear, and simple to view and understand. And it may be easier than you think!
Here are some tips that will make your videos more viewable for all sorts of audiences using the platform.
1. Follow Youtube’s video specifications
You must make sure to upload video footage that’s optimised for YouTube. Even though YouTube is going to transcode everything uploaded to standardise the encoding, you should keep in mind that transcoding reduces quality and takes time, so try to avoid a chain of processing steps that involves encoding the video over and over.
Fortunately, the platform supports a wide range of video specifications to cater to a variety of creators output, such as MOV, MPEG4, MP4, AVI, WMV, MPEGPS, FLV3GPP, WebM, DNxHR, ProRes, CineForm and HEVC (h265).
If you're not sure which format to save your video as, or are getting an "invalid file format" error message when you're uploading, make sure that you’re using one of the above formats.
It is also highly recommended to follow some best practices based on YouTube’s recommendations. It’ll take a little extra work, but it’s well worth the effort, especially as you start seeing your channel grow and drive off-platform results, too.
- Use an MP4 format.
- Encode using the H.264 codec (one of the most efficient options out there, allowing for a small file size without sacrificing video quality).
- Use an audio codec like AAC-LC.
- Encode and upload videos in the same frame rate it was recorded.
The standard aspect ratio for YouTube on a computer is 16:9. But when uploading other aspect ratios (vertical, square, etc.), the player automatically adapts itself to the size of the video, giving the best viewing experience based on the aspect ratio and device. So you need not worry much about that.
2. Use the right equipment
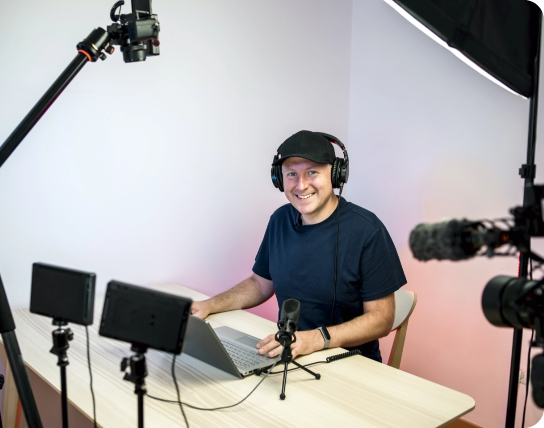
This tip is especially important for creators who are producing original content. About 400 hours worth of videos are being uploaded on Youtube every minute, so all those people out there must be having some or the other type of recording equipment with them.
But many videos are flimsy and shaky, while some stand out in terms of visibility and sound quality. Well, although not entirely, a lot of the good quality is usually down to the creator having spent the time to learn how to get the most out of their equipment and sometimes it's due to the superior equipment they are using.
While it's true that a good quality camera produces a much better video than a normal smartphone camera, you can also work wonders with even a basic phone. Also, use a tripod to mount your camera on, because a stable image looks a lot better than one created with an unsteady handheld camera.
Don't forget the sound, in fact, it's probably more important than the video and for many people learning how to set up a microphone well is one of the first things to consider. People can forgive mediocre video quality. But if the sound is low, distorted or sounds like it was recorded inside a cave, your viewers are quickly going to click next.
A great option is to spend some money on a Lavalier microphone. Even an inexpensive one which would cost $25-$30 would do the trick. Then, after recording the video, run a basic noise-removal filter to the recording. You’ll be shocked at how much noise it removes.
This way, your content will look and sound much more professional.
3. Equipment is one thing, skills another
Although tools do matter a lot, achieving a professional look depends a lot on your technique. If only buying costly equipment would have translated to good quality viewable videos, everybody would be having YouTube play button rewards hung on their walls. You need to learn skills that would help you to make better videos and make the best use of the resources present around you. In fact, professional video makers can produce good videos with even the most basic kit, while beginners can produce mediocre results even with the best equipment.
Learn how to utilise your equipment to their best
Creating a high-quality engaging video is a skill, one which many are not adept in. Simply buying costly equipment would do no good unless you learn how to properly handle them. Go through the user manuals of the equipment you are using, and understand each and every function carefully. There are also a lot of tutorials to help you get well versed with their proper use.
Ensure proper lighting
Digital cameras produce good results when there’s plenty of light: your sunny holiday snaps probably look great. They struggle in low light conditions, often producing images that look grainy due to digital “noise”.
Lighting doesn’t need to be very complicated, but it needs to be there and in sufficient amounts. Lighting will make even a low-quality camera produce much better video, and people just enjoy watching videos that are well-lit.
Distance and angle matter, even if you are not a physicist
One of the most important things that you should have a clear idea about, is the positioning of the camera. Things like camera angle and distance from the subject play a very pivotal role in deciding the final tone of the video. How much zoom you use is also important: too little, and the viewer will have a hard time watching the main subject. Too much, and you risk losing important parts of the background which give a complete picture to the content.
Similarly, the microphone also needs to be set up correctly so that it captures exactly what and how much you want it to.
Use a proper background
Be deliberate about the background you use for filming. A messy and distracting background looks highly unprofessional. Using a clean background will remove any distractions that might occur, and allow the user to focus more on the main subject.
Paying attention to little details adds up to a lot
Apart from the basics, there are quite a few details like image stabilisation, picture composition, subject positioning etc. which when paid attention to, produce awesome results as a whole. You should spend some time researching these things. Using a good video editing software will also help immensely in this regard.
4. Make videos that are clear to understand
The best advice that I can give here is: don’t rely entirely on the audio. According to lots of research, more than 80% of international viewers watch videos with the sound muted and subtitles on (for various reasons like being in a quiet place or being in a public place like standing in a queue and not having earphones with them).
Then there’s the issue of language and accent. When your viewer base starts to expand globally, there will be many among them who will not be able to understand the language you are using, or the particular accent used will be difficult for them to grasp.
When captions are available, many viewers said they are encouraged to turn the sound on because the videos seem more interesting, and even with the sound off, they were better able to understand the video because of the captioning. Many reports also suggested that adding captions helped ad performance, contributing to a lift in ad recall, ad memory quality and brand linkage.
So always use proper captions (open/closed), visual cues, headings and markers as and when required so that the videos are easy to understand. The video should be made in a way such that the audience should be able to get interested in the video itself, even if he/she is not listening to anything that is being said. Some significant channels that have become successful following this strategy are Tasty. The Dodo, 5-minute crafts etc. They became famous because they were clear to understand by their audience and easy to watch on the go.
You can also try to translate your videos in multiple languages and/or use subtitles according to your global viewership distribution, and TubeSpanner will prove to be very helpful in gaining those insights.
5. No boring lectures, please. They have colleges and universities for that.
Irrespective of the type of content you are creating, delivering the content in a wholesome manner plays a pivotal role in converting casual viewers to interested fans. Make your actual video content as long as it makes sense for your topic, but do it in a way so that the video does not become boring and repetitive. Make the content crisp and engaging.
Although longer videos equate to more watch time, which boosts your content in the algorithm (more on that later), don’t make a video longer just for the sake of making it longer because you’ll lose viewers. In general, videos from 7-15 minutes tend to perform best.
You must strike a delicate balance between making longer videos to increase watch time, and keeping the content short and on point. Ultimately, the right length for a video is just long enough to get all of the information across without padding your video.
The more professional and viewable your videos are, the more your brand will benefit from them. And, while making professional-looking videos does take some practice and know-how, it’s not some rocket science that needs years of research. It will come to you gradually with time as you gain more insights and experience. You can step up the viewability of your next video dramatically just by applying the basic techniques listed in this article. And, you always have TubeSpanner to support you in your journey!
Over to you! Have you applied any of the tips given? Which of these tips and tactics are you going to try? Do you have any additional thoughts on how to make your videos look great? Do let us know! We would love to hear from you!
